Configuration
Configuration of the Taler payment provider
Une fois que l’add-on est installé depuis le menu Apps:
Go to the payment providers menu. It can be accessed in multiple ways:
Website -> Configuration -> eCommerce -> Payment Providers.Invoicing -> Configuration -> Online Payments -> Payment Providers.
Either way you land here, this is the list of your currently available payment providers.
A new
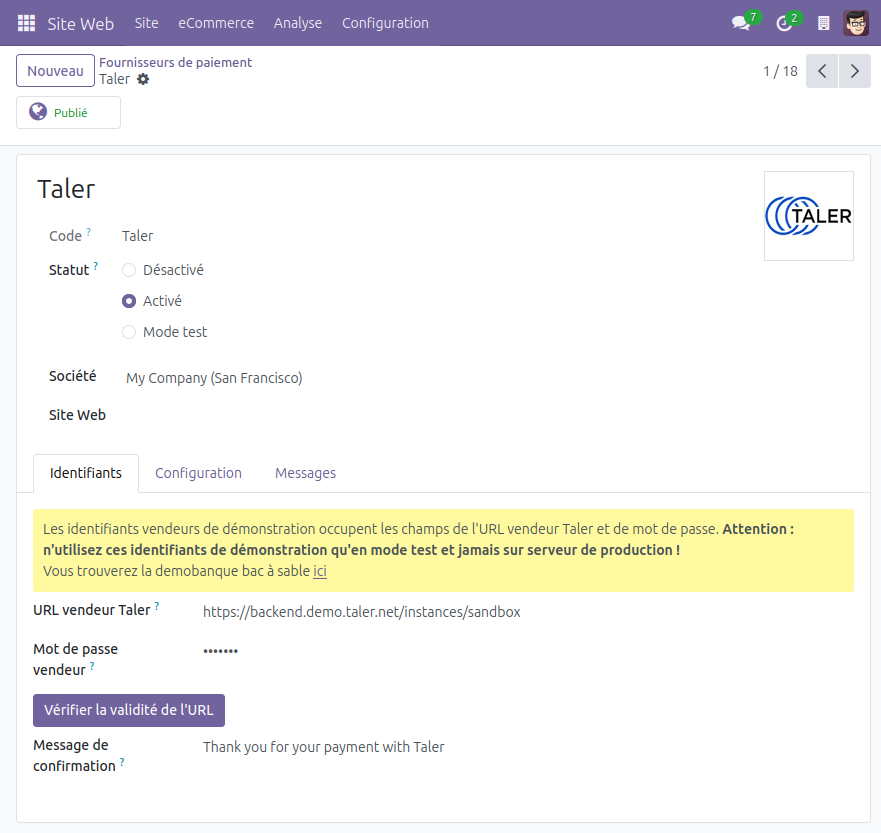
Talerpayment provider will be in this list, set as disabled for now.Click on the Taler payment provider.
In the
Credentialstab, set the Taler merchant URL.By default, the demobank’s credentials are used. You can access the demobank here
After setting the URL, you can click the
Check URL validitybutton to check if the entered URL is reaching a valid Taler merchant, and that this merchant’s accepted currencies are compatible with you Taler available currencies.You can find the accepted currencies in the
Configurationtab.
Then set the Taler Merchant Password. It will be used for API calls to the merchant.
You may want change the Taler fulfillment message as well. It will be shown on created Taler transactions
This change is only for the Taler order, there will be no change in Odoo.
If you’d like to change the Odoo fulfillment messages shown to the customers after a payment using Taler, you can do so in the
Messagestab.
The default values are connecting to the sandbox Taler merchant:
Password: sandbox
It is advised, but completely optional, to create a Taler-specific Journal (this can be set in the Configuration tab).
This will help during the Accounting process.
Click the
Enabledradio button.
The initial setup is now complete and Taler payment will be available in all eCommerce, online payments and Invoicing apps.